Search

Showing posts with label tips. Show all posts

Saturday, December 1, 2007

Shooting Fireworks - Photography tips for Holidays

Shooting fireworks can be tricky to get right. Here are my favorite settings for getting the best shots

IMG_3946


1) Use a tripod, you need to take long exposures

2) Find a good location. This means you need go there early. if possible get a good foreground like a water body where you can capture some good reflection.

3)Use a cable release to time your shots

3) Use manual focus to focus the fireworks when it starts. You will not be able to use auto focus with much success here

4) Keep ISO low like 100

5) Switch to Manual mode in your camera

6) Choose Bulb mode exposure and keep aperture small like f8 or f11. This will take care of focus as fireworks will keep busting all over the sky.

7) Raw shooting is recommended .

7) Using the cable release start the bulb exposure shot when you see the fireworks starting. release the shutter after you have seen the full burst. This will give a full view of the fireworks rather than just the final burst.

8) Another advantage of using cable release is that you need not look though the view finder all the time. You just need to do it once to make sure that focus and settings are fine. After you have reviewed the initial shots you can make any exposure adjustments. After that you can watch and enjoy the fireworks and just keep clicking the remote cable when you see something interesting to capture.

9) Enjoy the show


Here are some more that I took one the same day. They are linked to my Flickr Ablum http://flickr.com/photos/arunsasi

IMG_3933

Fireworks with zoom blur

IMG_3933

IMG_3939

Happy Independence Day

Wednesday, November 14, 2007

Cross Process Lightroom plugin / Preset

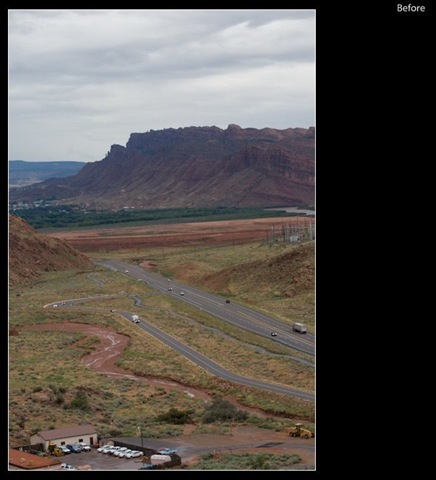
cross_process_experiment_before

Before

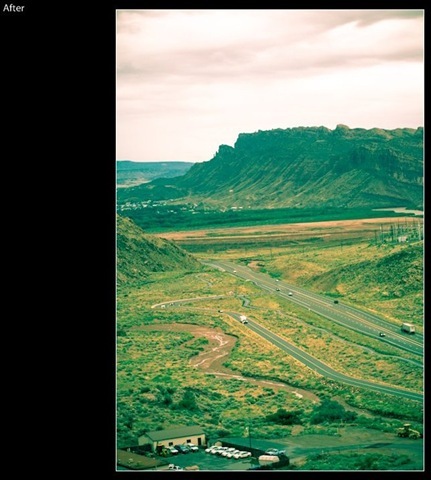
cross_process_experiment_after

After

This is a preset for Adobe Lightroom available for download at at Lightrooms Killer tips  website

Its gives a cool effect to some pictures. It tends to apply a green tint so be selective in where u use them. You might find that some otherwise boring photos will get a new life with this preset. Here is one such attempt from me. This was taken at the Arches National Park, MOAB,Utah.

Thursday, November 8, 2007

Adobe Light Room Tip - Edgy Effect

If you use Adobe Lightroom - A new and useful photographic workflow tool from Adobe, you should try this cool effect. This is by mattk from lightroomkillertips.com
This effect can be useful for Street or Urban type of photography. he does a lot of fast adjustments to various settings like recovery, filllight, contrast etc. Luckily there is a detailed instructional video of about 10 MB. You may have to watch the video twice or thrice to get the idea

here is the link http://www.lightroomkillertips.com/2007/video-surreal-edgy-effect/

Wednesday, October 17, 2007

Recommended SLR Camera Gear for the Uncompromising Beginner

So you want to put together an excellent camera kit without spending much money one gear. This is what I would recommend for general purpose shooting.

Camera bodies keep advancing at a very fast pace. What you get today will probably get replaced with a more feature rich model in 18 months. Therefore if you have a strict budget, it is not very advisable  to go for an expansive camera body. However lenses are almost made for ever. A good lens today would be just as useful 10-15 years from now. In my opinion, its better to invest in good glass than a pro body when u start with photography. You can always upgrade you body later and still use the same good lenses on it. I suggest some of the best affordable lenses that you can buy. Two of the three mentioned here are from the Canon's Luxury L series


  • Canon EOS 400D / Rebel XTi

This is the best value for money when SLRs are considered. Plenty of features. The Canon EOS Digital Rebel XTi has a newly designed 10.1 MP Canon CMOS sensor plus a host of new features including a 2.5-inch LCD monitor, the exclusive EOS Integrated Cleaning System featuring a Self Cleaning Sensor and Canon's Picture Style technology, all in a lightweight, ergonomic body. The EOS Digital Rebel XTi is compatible with all Canon lenses in the EF lineup, ranging from ultra-wide angle to super telephoto lenses, and including Canon's EF-S series lenses, manufactured specifically for Canon's APS-C sized digital sensor. An EF-S 18-55mm is included in the EOS Digital Rebel XTi Lens Kit. 1.6x Lens Focal Length Conversion Factor Image Sensor Type - High-Sensitivity, high-resolution, single-plate, CMOS sensor 3 - 2 Aspect Ratio Recording Format - JPEG, RAW, and RAW+JPEG simultaneous recording provided USB 2.0 Hi-Speed Interface, mini-B port, NTSC/PAL for video output Viewfinder Type - Eye-level SLR with pentamirror Shutter Speeds - 1/4000 to 30 seconds Self-timer - 10 seconds delay, 2 seconds delay with C.Fn-7-1 (mirror lockup) Continuous Shooting Speed - Approx. 3 fps (at shutter speed of 1/250 sec. or faster)


  • Canon EF 17-40 f4 L lens

Excellent for Wide Angle, General Purpose and Landscape photography. a bit short for portraits in my view.

    • EF mount; ultra-wide zoom lens
    • Super Ultra-low Dispersion glass; inner focusing; aspherical lens; full-time manual focus
    • 17-40mm focal length
    • f/4 constant maximum aperture
    • Ring-type UltraSonic Motor (USM)
 

  • Canon EF 50mm f 1.8 
  • Lightweight and affordable, this sharp lens with a fast f/1.8 aperture is an excellent first lens for those who prefer a fixed focal length, and makes an excellent addition to any photographer’s system for available-light shooting. A traditional Gauss-type optical design ensures sharp performance even wide open, and it focuses as close as 18 inches/0.45m.

    A medium telephoto lens with a large aperture brings the subject closer, creates excellent background blur, gives a longer flash range, and affords a faster shutter speed to freeze the action. A standard zoom lens, with its natural angle of view and perspective, captures the subject plainly, with no special effects. However, you can use standard lenses in creative ways by varying the subject distance, aperture, and angle.

  • Great general purpose lens for low light shooting. Also good for portraits. Excellent deal when you consider the price is only 80$.
  • Strongly recommended for most general-purpose photography
  • Designed exclusively for use with Canon SLR cameras


  • Canon EF 70-200 4 L USM

This is Great telephoto lens for a great price. I often use it for outdoor portraits and even for landscapes.  This high performance L-series telephoto zoom lens ensures excellent image quality for every photographic situation and milieu. Filter Diameter - 67mm Lens Construction - 16 elements in 13 groups Minimum Aperture - f/32 Focus Drive - Ultrasonic 76mm x 172mm 705g

      • EF mount; telephoto zoom lens
      • Ultra-low Dispersion glass with Fluorite elements; inner focusing ring; full-time manual focus
      • 70-200mm focal length
      • f/4 constant maximum aperture
      • Ring-type UltraSonic Motor (USM)
Monday, October 8, 2007

Turret Arch - Arches National Park, Utah - Tips for photos and travel

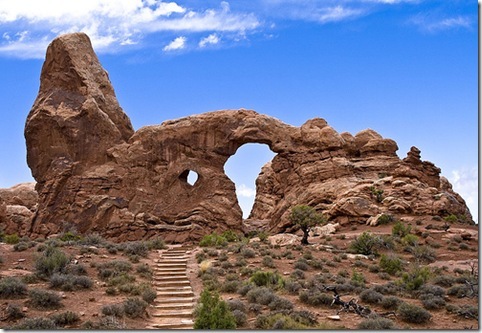
turret Arch

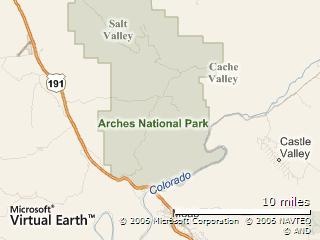
Turret Arch is a very well known geological structure inside the Arches National Park, Utah. Arches National Park contains the world's largest concentration of natural stone arches. Once you are here, you can plan to Hike, Bike, Do rock climbing, horse riding, ATV off-road tours etc. Perhaps even take the Guided tours .Unfortunately I reached there around noon. The flat light will make the pictures dull. If you can reach there for sunset you can really make the pictures pop. Here is a map of the location.

Map of Arches National Park

Tips for getting good photos here

  • The best times to visit and photograph this location is early morning or late evening. The color of the red rocks will be enhanced by the good lighting.
  • Watch for the forecast as it rained the day we went there and we lost much time.
  • Pack your lunch and snacks and get lots of water. Rest rooms and Drinking water are available only in very select locations inside the park.
  • You would need a tripod and a polarizing filter to get good shots
  • If you have a neutral density filter, that would help when the sky is real bright.
  • Try out multiple exposures for HDRs and experiment with Panos
  • Make sure that you don't obstruct other persons view when u shoot

The park has a nominal entrance fee of 10$ per vehicle which is good for 7 days. Make sure that you book your accommodation in advance as The nearby town of MOAB will get filled easily on summer weekends. The downtown has some excellent shops to buy Native Indian art and some good restaurants. Make sure that you grab a copy of the Downtown guide from your hotel. Its is also available in the shops along on the sidewalk. While you are there, please don't forget the Other major parks there like the Canyonlands National Park and Zion

I would Suggest getting one of the following books that would help you understand more about the park and the state

More Information

http://www.nps.gov/arch/